Feltwell
Member
- Messages
- 6,382
- Location
- Shropshire, England
The saga is long but the bathroom is teeny tiny. Well, small at least....
Now this is not my usual sort of project thread, there's no pretence here of putting something in that is trying to look old, these have to be functional rooms for the family first and foremost - squeezing the kit to deliver that within a confined space was what mattered, practicality was king.
Here at Feltwell Towers, which is a 5 bed Victorian place over 3 floors, we have a stupidly narrow family bathroom on the back corner of the house. It has 2 outside walls, and 1 and a half of the inside walls go onto the stairwell - but - half of one wall goes onto another room, giving potential to enlarge it. It always was a bathroom, but originally had no toilet.
The adjoining room would originally have been a box room, for storage - too small for even a single bed. Luckily, they did put a window in it. It had been very badly converted into a 2nd bathroom by previous owners, with an extra small bath - the people before us then converted it again into an en-suite shower room, moving the door from the landing onto one of the bedrooms. This en-suite conversion was done really, *really* badly.
The good part is, 2 rooms adjacent to each other, next to the external soil pipe, above the downstairs loo - so plumbing is easy. The bad bit - both rooms are very tight on size, the bathroom has 2 windows on a dual aspect which makes the layout difficult, and the 2 rooms are at totally different floor heights - 2 steps apart in fact. The wall between them is masonry and load bearing, just to keep it interesting.
Both bathrooms badly needed re-fitting, so if we were to do anything about the family bathrom to make it bigger, now was the time. Much head scratching revealed that I could turn the family bathroom into an L shape by robbing space from the en-suite, and still have a functioing en-suite shower room with a decent size shower cubicle - just. The other option was to have 1 big bathroom, but that just didn't work, largely because of the different floor heights which could not be easily overcome.
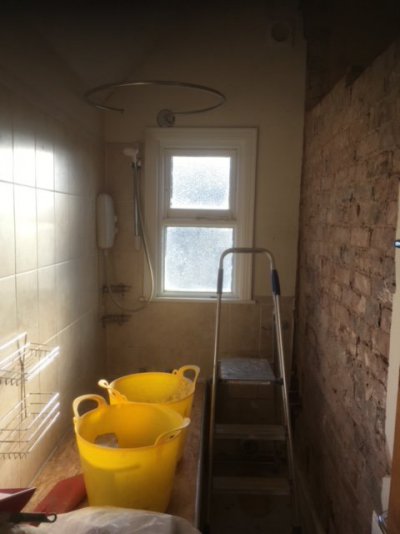
So, first job, strip out the en-suite, leaving the family bathroom still working. I haven't got any true "before" pictures, this is the closest I've got, what it reveals is a room with a knackered lath & plaster wall on one side, patched up badly below and to one side with (now soggy) plasterboard. The whole room hangs above an open stairwell, hence the need for the lightweight lath & plaster wall. It's the masonry wall on the end that is being moved.
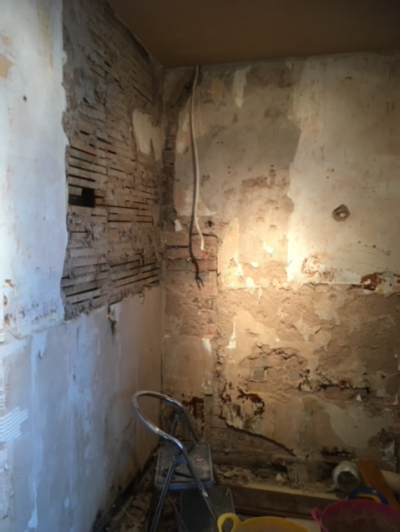
Here's the same room with the plaster removed:-
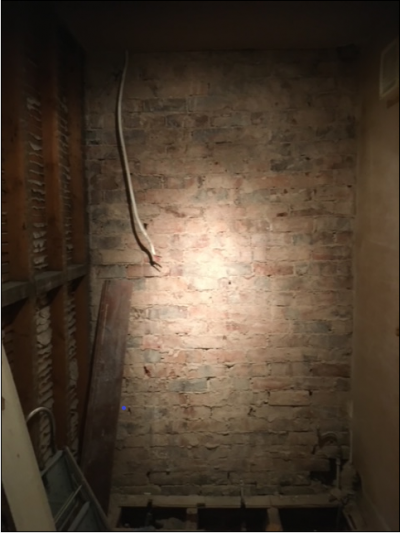
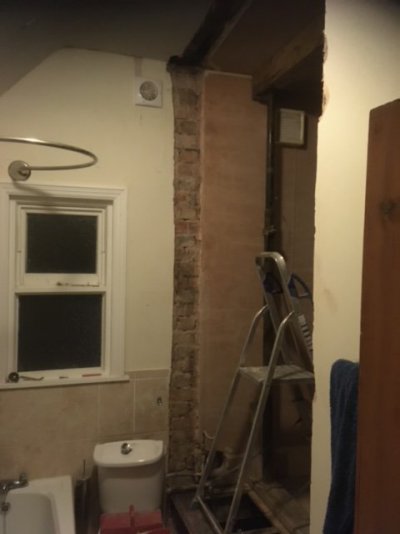
Here's the family bathroom, with the other side of that wall exposed, as I was taking it down. You can see how stupidly narrow it was - the yellow buckets are sat on top of the very narrow bath, the set of steps are where the loo was, which was so tightly pinned in that gap it was uncomfortable to use This picture actually shows the wall when it was part way down - but - first I had to support what was above.
The room above had joists that ended at the wall that I was due to take out. However, rather than bearing on the masonry, they were mortice and tenoned into a wall plate - a timber beam - that ran along the top of that wall. That wall plate was *probably* enough to support the room above without the wall beneath,, but probably is not good enough - so the floor joists above were supported temporarily on one side with acro props and a temporary timber beam, whilst a new timber beam was inserted to cover the to-be-removed wall section. This was subject to Building Control, so I had to get a Structural Engineer to provide the calcs for the beam size and get Building Control in to sign the work off. You see it best in this "after" picture - wall down, temporary support behind the steps, new permanent beam yet to go in:-
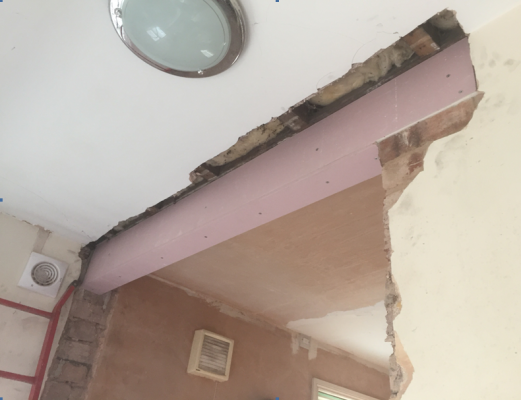
And the new beam in, covered with fire resistant plasterboard to keep Building Control happy:-
Taking that wall down gave me a bonus, a decent pile of bricks that matched the external house wall, which badly needed some repairs. I just can't get reclaims to match, so this was a godsend.
Now that the wall was down, time to get the plumbing in place prior to building the new stud wall. We took the opportunity at the same time to change the central heating boiler and change the hot water from a gravity feed to a pressurised feed, as we wanted more powerful showers, plus the old boiler wasn't really big enough to handle extreme winter temperatures - so a lot of change, and plumbing affected that goes under these rooms.
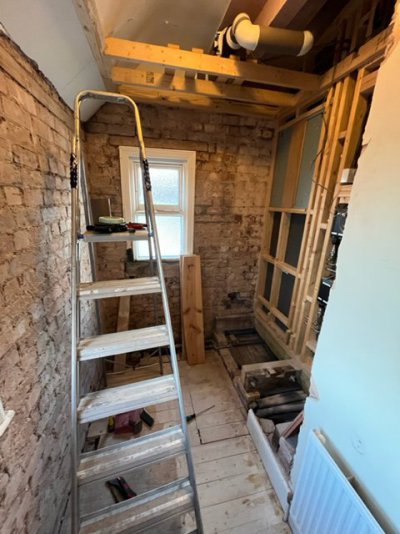
Here's a shot of the en-suite before the new wall went in, but after the plumbing had been prepared:-
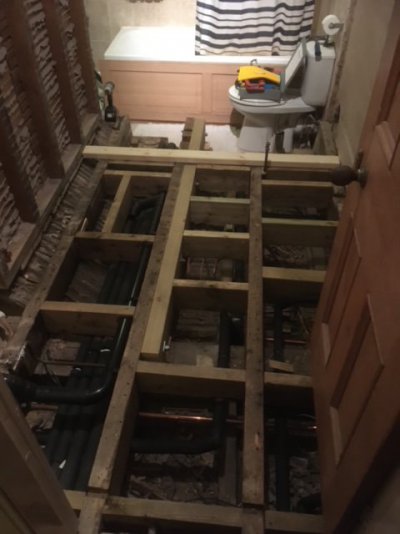
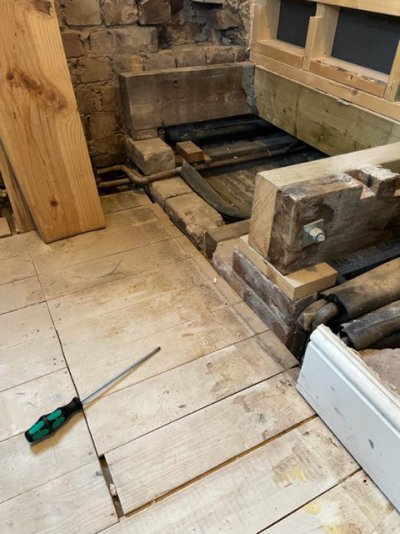
There's actually 3 layers of joists, at right angles to each other, under that floor! Handy really, as it gives space to thread pipes through north-south and east-west by changing levels. All supply pipework was done in soldered copper, I don't trust plastic, too many o-rings to fail in future. Waste pipework was done in the big 50mm / 2" size in solvent welded plastic - probably over the top, but it was taking both sink and shower waste and was quite convoluted and would be very difficult to get back to in order to unclog anything - using 2", and making bends as gentle as possible, using slow bends or 2 x 45 degree bends rather than sharp 90 degree elbows, should mean it never clogs.
You'll see above there is a joist that's been doubled up. There's a good reason for this, and it's typical of the level of workmanship of the previous en-suite. This joist is the most heavily loaded one of all - but it fouled the waste from the old shower tray - so they did this:-
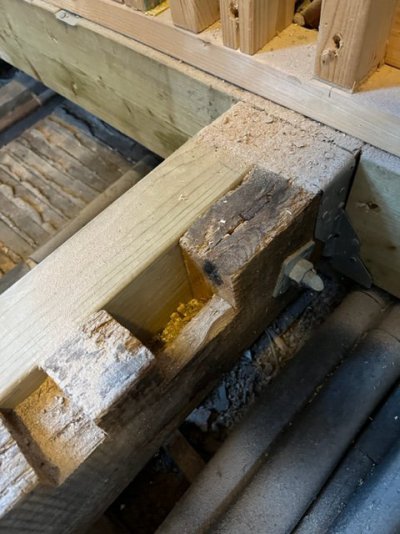
Yes, they cut away two-thirds of the joist - it's no wonder the floor was a bit bouncy! Difficult to replace the joist, better to do what I did which was to bolt a new one alongside it crossing over between structural supports below - there's wall below the room that you can't see in these pictures.
Here's the sub-floor from the other end:-
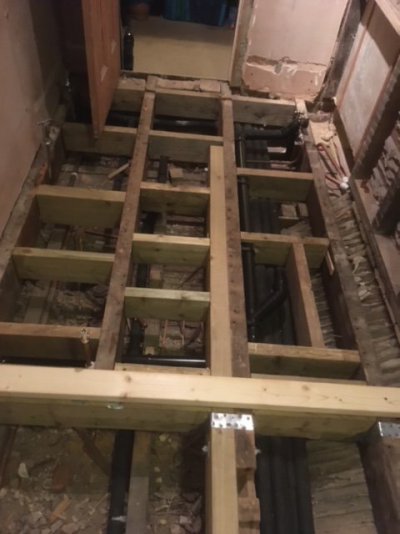
Lots and lots of new noggins added to take bounce out of the floor. One floor joist was shortened and attached to a new cross-joist - that gives me a "hole" between remaining joists to slot the bath into when I get to do the family bathroom - which is 2 steps down. That new cross joist sits under the new stud wall. 1" thick marine ply was used for the new floor, so it's all *very* solid now.
So, boiler changed, plumbing prepared, electrics prepared, and a new stud wall goes in to separate the two rooms:-
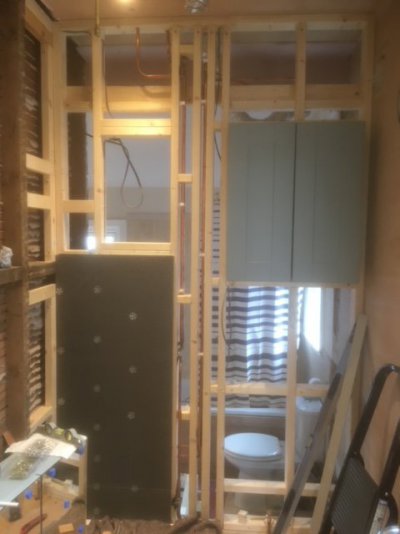
The timber looks a bit random, but it's all very carefully positioned to act as a fixing point for all the various items that need to be fixed to the wall! The blue cabinet is there as I built them into the wall - save some space as it protrudes into the room. The black board in the bottom left is Abacus Elements board. Fantastic stuff - it's a closed cell foam core with a fibre reinforced facing on both sides. The result is a wall board which is light, easy to cut, strong and totally impervious to water and water vapour - ideal for tiling onto. I can't recommend it enough, after screwing into position you seal the joints with a special compound and some neoprene tape. Plasterboard, even moisture resistant plasterboard, has no place in a bathroom, it fails far too easily.
This video is worth watching, it shows the wallboard going in and also a No More Leaks kit to seal around a shower tray, which I also used.
So, walls are all boarded and joints sealed , loads and loads of incidental jobs done, such as renovating the horrible grotty (but original) door, taking out the door frame - which was just bits of scrap timber bodged into a hole in the brickwork that looked like they'd got a bear to chew through - repairing the brickwork, making and fitting a new door lining, new architrave, finding a nice bit of oak for a step - renovating the rather rotten window and converting it take a double glazed unit - cutting a new hole for a soil pipe and making good the old hole - removing and making good where an old extractor fan had been - basically 1001 minor but essential jobs.
Shower tray fitted, then time to tile!
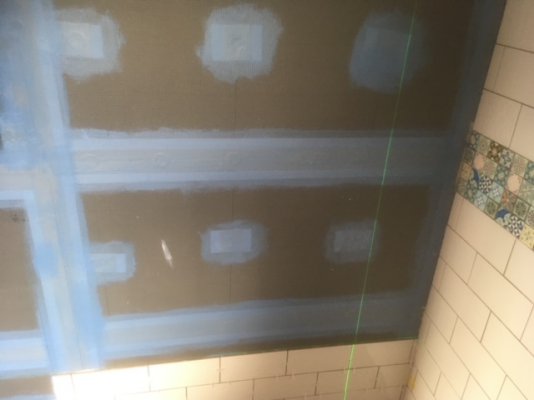
You can see the blue sealant and tape across the board joints and fixings, creating a surface totally impervious to water - if any moisture gets behind the tiles it should do no damage, especially with the sealing system used beneath the tiles around the shower tray. The green line is a laser - a self-levelling laser that gives you vertical and horizontal lines to work to is quite a cheap tool now, and very useful for tiling and other jobs.
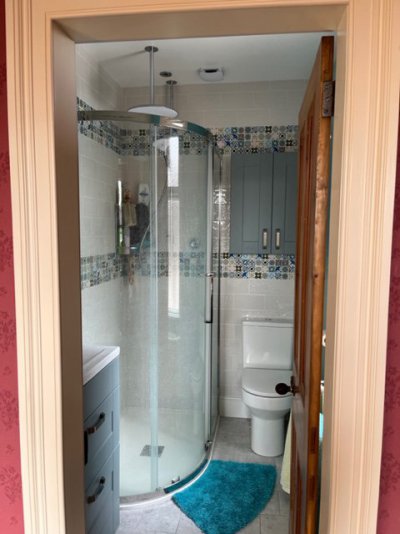
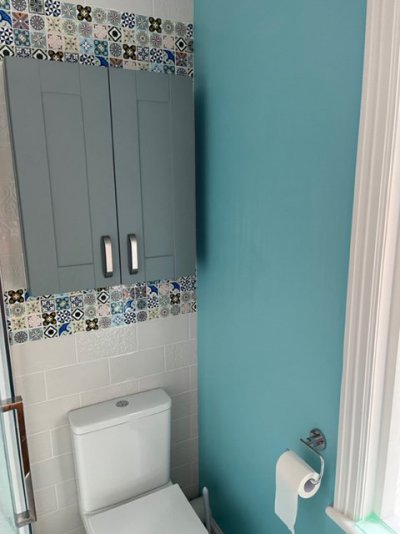
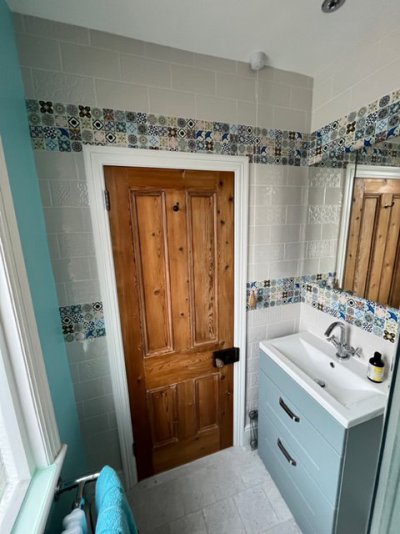
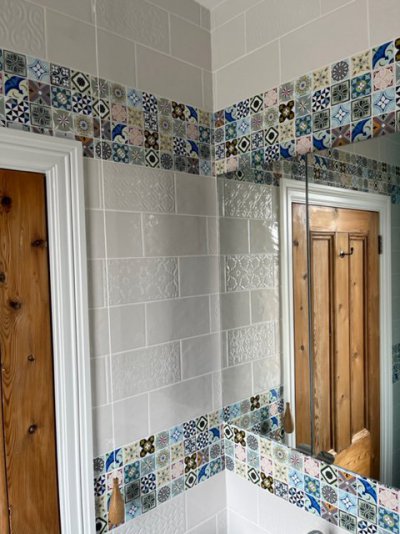
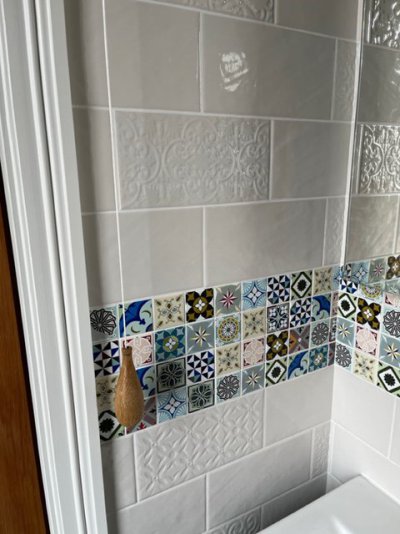
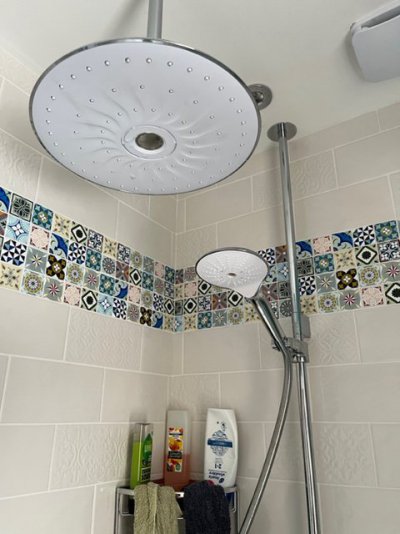
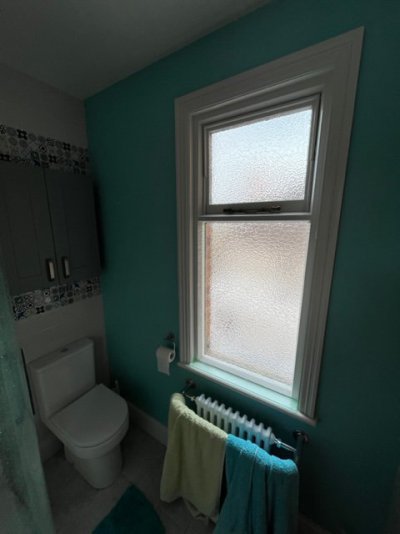
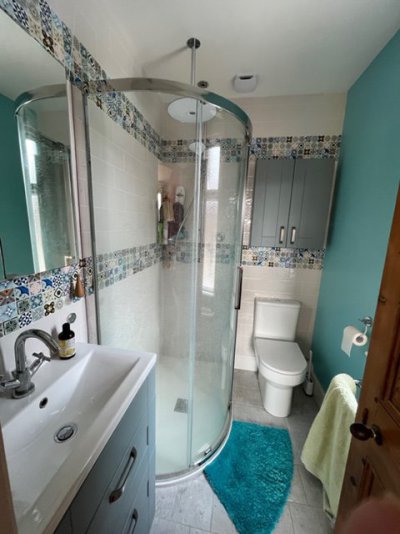
Fast forward to the end - hard to take pictures as it's such a small room, but whilst it's small it's got everything that's needed and it doesn't feel cramped. New post showing the finished room below, ran out of image allowance on this one!
Now this is not my usual sort of project thread, there's no pretence here of putting something in that is trying to look old, these have to be functional rooms for the family first and foremost - squeezing the kit to deliver that within a confined space was what mattered, practicality was king.
Here at Feltwell Towers, which is a 5 bed Victorian place over 3 floors, we have a stupidly narrow family bathroom on the back corner of the house. It has 2 outside walls, and 1 and a half of the inside walls go onto the stairwell - but - half of one wall goes onto another room, giving potential to enlarge it. It always was a bathroom, but originally had no toilet.
The adjoining room would originally have been a box room, for storage - too small for even a single bed. Luckily, they did put a window in it. It had been very badly converted into a 2nd bathroom by previous owners, with an extra small bath - the people before us then converted it again into an en-suite shower room, moving the door from the landing onto one of the bedrooms. This en-suite conversion was done really, *really* badly.
The good part is, 2 rooms adjacent to each other, next to the external soil pipe, above the downstairs loo - so plumbing is easy. The bad bit - both rooms are very tight on size, the bathroom has 2 windows on a dual aspect which makes the layout difficult, and the 2 rooms are at totally different floor heights - 2 steps apart in fact. The wall between them is masonry and load bearing, just to keep it interesting.
Both bathrooms badly needed re-fitting, so if we were to do anything about the family bathrom to make it bigger, now was the time. Much head scratching revealed that I could turn the family bathroom into an L shape by robbing space from the en-suite, and still have a functioing en-suite shower room with a decent size shower cubicle - just. The other option was to have 1 big bathroom, but that just didn't work, largely because of the different floor heights which could not be easily overcome.
So, first job, strip out the en-suite, leaving the family bathroom still working. I haven't got any true "before" pictures, this is the closest I've got, what it reveals is a room with a knackered lath & plaster wall on one side, patched up badly below and to one side with (now soggy) plasterboard. The whole room hangs above an open stairwell, hence the need for the lightweight lath & plaster wall. It's the masonry wall on the end that is being moved.

Here's the same room with the plaster removed:-

Here's the family bathroom, with the other side of that wall exposed, as I was taking it down. You can see how stupidly narrow it was - the yellow buckets are sat on top of the very narrow bath, the set of steps are where the loo was, which was so tightly pinned in that gap it was uncomfortable to use This picture actually shows the wall when it was part way down - but - first I had to support what was above.

The room above had joists that ended at the wall that I was due to take out. However, rather than bearing on the masonry, they were mortice and tenoned into a wall plate - a timber beam - that ran along the top of that wall. That wall plate was *probably* enough to support the room above without the wall beneath,, but probably is not good enough - so the floor joists above were supported temporarily on one side with acro props and a temporary timber beam, whilst a new timber beam was inserted to cover the to-be-removed wall section. This was subject to Building Control, so I had to get a Structural Engineer to provide the calcs for the beam size and get Building Control in to sign the work off. You see it best in this "after" picture - wall down, temporary support behind the steps, new permanent beam yet to go in:-

And the new beam in, covered with fire resistant plasterboard to keep Building Control happy:-

Taking that wall down gave me a bonus, a decent pile of bricks that matched the external house wall, which badly needed some repairs. I just can't get reclaims to match, so this was a godsend.
Now that the wall was down, time to get the plumbing in place prior to building the new stud wall. We took the opportunity at the same time to change the central heating boiler and change the hot water from a gravity feed to a pressurised feed, as we wanted more powerful showers, plus the old boiler wasn't really big enough to handle extreme winter temperatures - so a lot of change, and plumbing affected that goes under these rooms.
Here's a shot of the en-suite before the new wall went in, but after the plumbing had been prepared:-

There's actually 3 layers of joists, at right angles to each other, under that floor! Handy really, as it gives space to thread pipes through north-south and east-west by changing levels. All supply pipework was done in soldered copper, I don't trust plastic, too many o-rings to fail in future. Waste pipework was done in the big 50mm / 2" size in solvent welded plastic - probably over the top, but it was taking both sink and shower waste and was quite convoluted and would be very difficult to get back to in order to unclog anything - using 2", and making bends as gentle as possible, using slow bends or 2 x 45 degree bends rather than sharp 90 degree elbows, should mean it never clogs.
You'll see above there is a joist that's been doubled up. There's a good reason for this, and it's typical of the level of workmanship of the previous en-suite. This joist is the most heavily loaded one of all - but it fouled the waste from the old shower tray - so they did this:-

Yes, they cut away two-thirds of the joist - it's no wonder the floor was a bit bouncy! Difficult to replace the joist, better to do what I did which was to bolt a new one alongside it crossing over between structural supports below - there's wall below the room that you can't see in these pictures.
Here's the sub-floor from the other end:-

Lots and lots of new noggins added to take bounce out of the floor. One floor joist was shortened and attached to a new cross-joist - that gives me a "hole" between remaining joists to slot the bath into when I get to do the family bathroom - which is 2 steps down. That new cross joist sits under the new stud wall. 1" thick marine ply was used for the new floor, so it's all *very* solid now.
So, boiler changed, plumbing prepared, electrics prepared, and a new stud wall goes in to separate the two rooms:-

The timber looks a bit random, but it's all very carefully positioned to act as a fixing point for all the various items that need to be fixed to the wall! The blue cabinet is there as I built them into the wall - save some space as it protrudes into the room. The black board in the bottom left is Abacus Elements board. Fantastic stuff - it's a closed cell foam core with a fibre reinforced facing on both sides. The result is a wall board which is light, easy to cut, strong and totally impervious to water and water vapour - ideal for tiling onto. I can't recommend it enough, after screwing into position you seal the joints with a special compound and some neoprene tape. Plasterboard, even moisture resistant plasterboard, has no place in a bathroom, it fails far too easily.
This video is worth watching, it shows the wallboard going in and also a No More Leaks kit to seal around a shower tray, which I also used.
So, walls are all boarded and joints sealed , loads and loads of incidental jobs done, such as renovating the horrible grotty (but original) door, taking out the door frame - which was just bits of scrap timber bodged into a hole in the brickwork that looked like they'd got a bear to chew through - repairing the brickwork, making and fitting a new door lining, new architrave, finding a nice bit of oak for a step - renovating the rather rotten window and converting it take a double glazed unit - cutting a new hole for a soil pipe and making good the old hole - removing and making good where an old extractor fan had been - basically 1001 minor but essential jobs.
Shower tray fitted, then time to tile!

You can see the blue sealant and tape across the board joints and fixings, creating a surface totally impervious to water - if any moisture gets behind the tiles it should do no damage, especially with the sealing system used beneath the tiles around the shower tray. The green line is a laser - a self-levelling laser that gives you vertical and horizontal lines to work to is quite a cheap tool now, and very useful for tiling and other jobs.
Fast forward to the end - hard to take pictures as it's such a small room, but whilst it's small it's got everything that's needed and it doesn't feel cramped. New post showing the finished room below, ran out of image allowance on this one!
Last edited:

